- Software Development
- NextJS
- Airtable
How to create an image gallery using Airtable with NextJS
A step-by-step guide on setting up an image gallery using Airtable with NextJS and TailwindCSS for styling
Why Airtable
It didn't took long for me to decide on using Airtable as my data source given I've used it many times in the past to create quick MVPs and hacks. To those unfamiliar, Airtable is like Google Spreadsheets on Nitro. It basically lets you create and manage databases with the ability to add scripts and extensions to do pretty much anything you need. It's highly customizable and offers a variety of options for integrating with different services (i.e. Google Calendar, Salesforce, Asana, etc).
Why NextJS
Next.js is a popular JavaScript React-based framework for building fast-loading static and server-rendered sites. Since my website and blog will consist mainly of static content, Next JS was the obvious choice. It was easy to start and the deployment is a breeze with platforms like Vercel.
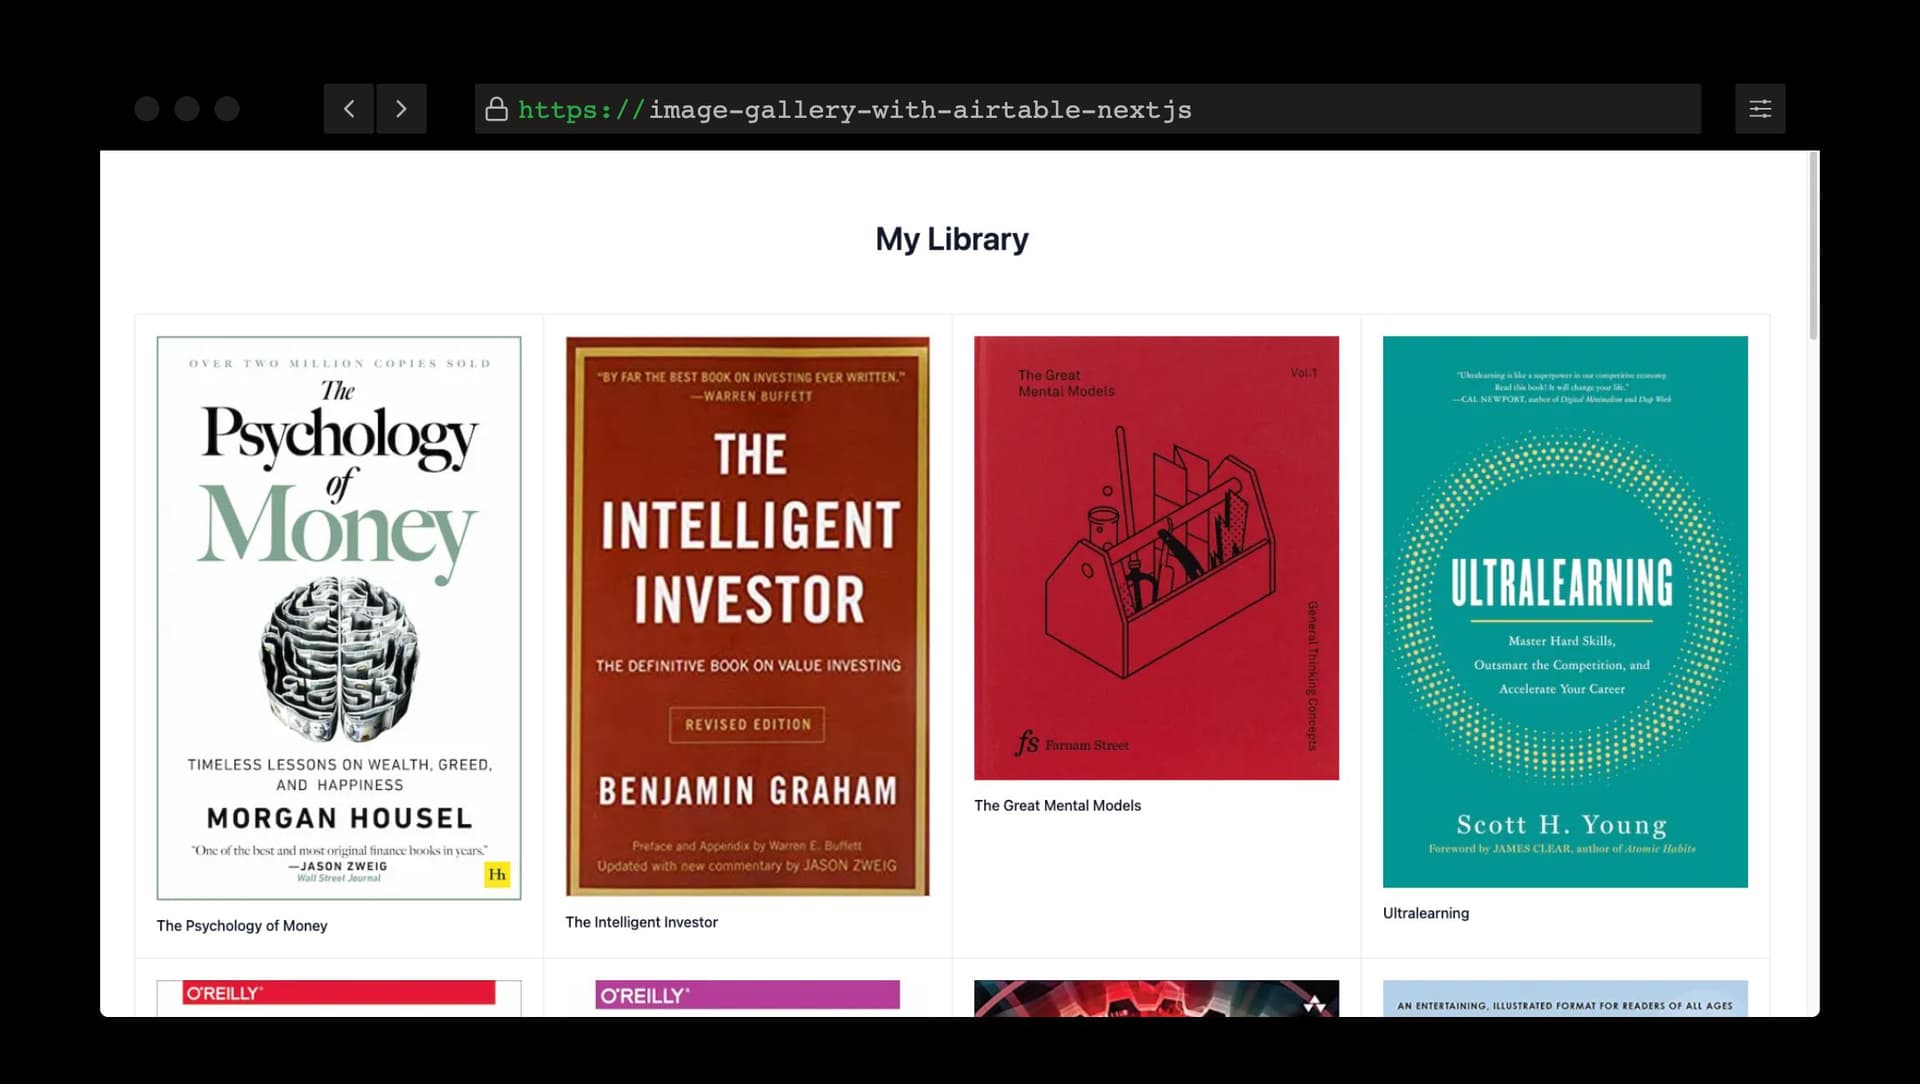
In this article, I'll be guiding you on how to re-create my Books page that shows you a gallery of all the noteworthy books I've read in the past.
Let's get started!
1. Set up an Airtable account
Now, let's talk about how to create your database of images using Airtable. Here are the steps:
- Sign up for an Airtable account and create a Workspace
- Update the default table/spreadsheet with the relevant columns. I've updated mine with a `Title` (Single Line Text), `Image` (Attachment) and `URL` (URL) columns.
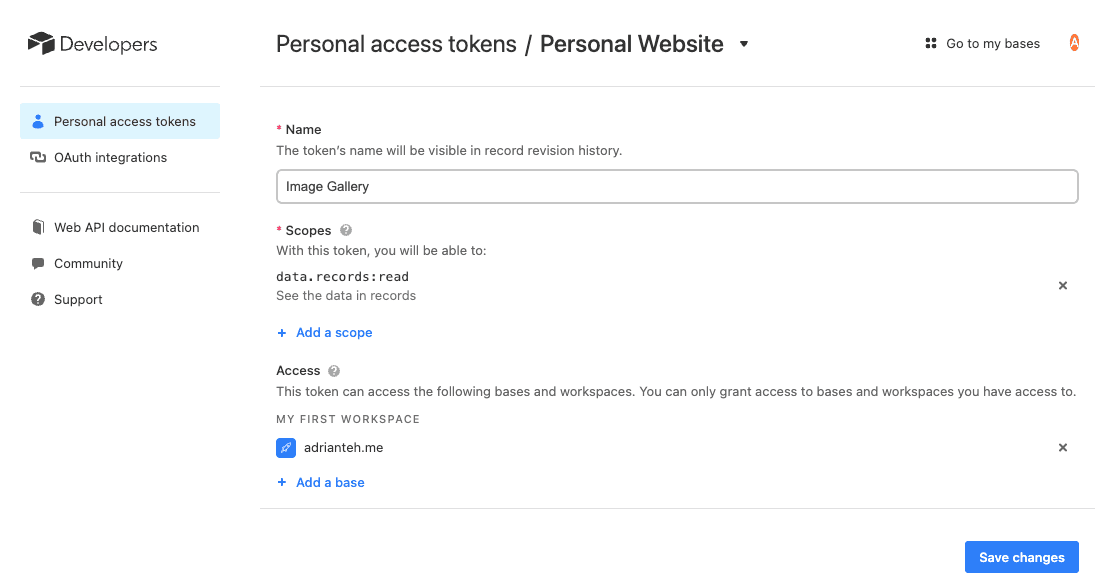
- Create an Airtable personal access token. This can be done by going to the "Developer Hub" page in Airtable and then generating a new personal access token. Here's a link for your convenience https://airtable.com/create/tokens
- Give your token a name, and provide the token with the right access scope and workspace by selecting the
data.records:readscope and add your workspace.
Done. Let's move on to the fun part!
2. Set up NextJS with TailwindCSS
Start off by creating your NextJS app
npx create-next-app@latest books --use-npmI'm going to be using Tailwind CSS for this guide, so lets install it along with its dependencies. Running the init command will generate both tailwind.config.js and postcss.config.js
npm install -D tailwindcss postcss autoprefixer
npx tailwindcss init -p
Depending on your setup, add the paths to all of your template files by updating the newly generated tailwind.config.js file. In my example below, I'm adding the path to my src folder:
/** @type {import('tailwindcss').Config} */
module.exports = {
  content: ['./src/**/*.{js,ts,jsx,tsx}'],
  theme: {
    extend: {},
  },
  plugins: [],
}
Next, go to your styles/globals.css file and add the tailwind directives as follow. You can choose to remove any existing default styles generated:
@tailwind base;
@tailwind components;
@tailwind utilities;
Now that tailwind is setup, lets create a .env.local file in our root directory to manage our Airtable token, base and table id that we will need later on as environment variables. We can then conveniently access them via process.env later. Here's an example:
AIRTABLE_TOKEN='your-airtable-personal-access-token'
AIRTABLE_BASE_ID='airtable-baseid'
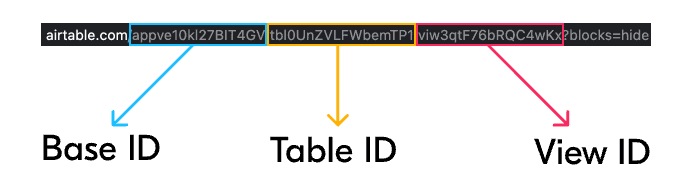
AIRTABLE_TABLE_ID='airtable-workspace-table-id'The following is a guide from Airtable on locating your base and table ID. To do so, simply navigate to your Airtable workspace and utilize the URL in your browser's address bar.
With the environment variables out of the way, lets start up our NextJS app and visit localhost:3000 to make sure everything is loading fine:
npm run dev3. Set up the image gallery
Great! Let's head over to the src/pages/index.js page and start fetching the records from Airtable.
First, import next/image and next/link to load the images with links to the respective URLs from the Airtable workspace
Inside the getStaticProps function, fetch the records from your Airtable workspace using the environment variables you set up earlier with the process.env helper
Using the records, render your page accordingly. Below is a complete example of my index.js file for your reference.
import Head from 'next/head';
import Image from 'next/image';
import Link from 'next/link';
import { Inter } from '@next/font/google';

const inter = Inter({ subsets: ['latin'] });

export const getStaticProps = async (context) => {
  const res = await fetch(
    `https://api.airtable.com/v0/${process.env.AIRTABLE_BOOKS_BASE_ID}/${process.env.AIRTABLE_BOOKS_TABLE_ID}`,
    { headers: { Authorization: `Bearer ${process.env.AIRTABLE_TOKEN}` } }
  );
  const books = await res.json();
  return {
    props: {
      books: books.records,
    },
  };
};

export default function Home({ books }) {
  return (
    <>
      <Head>
        <title>My Library</title>
        <meta name="description" content="Generated by create next app" />
        <meta name="viewport" content="width=device-width, initial-scale=1" />
        <link rel="icon" href="/favicon.ico" />
      </Head>
      <main className="p-10 lg:py-20">
        <div className="mb-16">
          <h1 className="text-4xl text-gray-900 font-semibold text-center">
            My Library
          </h1>
        </div>
        <div className="mx-auto">
          <div className="grid grid-cols-2 border-l border-t border-gray-200 md:grid-cols-3 lg:grid-cols-4">
            {books.map((book) => (
              <div
                key={book.id}
                className="group relative border-r border-b border-gray-200 p-4 sm:p-6 bg-white"
              >
                <div className="aspect-w-1 aspect-h-1 bg-gray-200 group-hover:opacity-75">
                  <Image
                    priority
                    src={book.fields.Image[0].url}
                    alt={book.fields.Title}
                    width={300}
                    height={300}
                    className="h-full w-full object-cover object-center"
                  />
                </div>
                <div className="pt-4">
                  <h3 className="font-medium text-gray-900">
                    <Link
                      href={book.fields.URL}
                      target="_blank"
                      rel="noreferrer"
                    >
                      <span aria-hidden="true" className="absolute inset-0" />
                      {book.fields.Title}
                    </Link>
                  </h3>
                </div>
              </div>
            ))}
          </div>
        </div>
      </main>
    </>
  );
}
Here is the final result.
Wrapping things up
This article is one of many that I plan to share regarding my experiences and learnings gained from building my personal website using NextJS. I hope you found this article useful!